|
|
|


Through the Rip Tutorial
"I am a member of artists for paint shop pro. and it would be a privilege to have one of my tutorials displayed on your web site. But I would like you to also give credit to the person who helped me create that tutorial "Rukrzi" as it was her creation that she asked me to make the tutorial for."
The download consists of:
the fill pattern used in this tut, 6 dino's and Mac's Page Curl Filter
1) Open a new page 250 X 250 transparent.
2) Flood fill ![]() with a color or pattern.
with a color or pattern.
3) Now using the select tool
![]() set for
rectangle,
set for
rectangle,
select one corner like this:
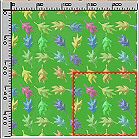
So it would be from the 125 to the 125 if you have the ruler active
4) Now go to image + filters + Mac's page curl
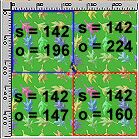
and use these setting for each corner:
S = Size O = Orientation leave all other setting as is.
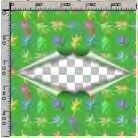
5) Now go to layer + new when the box opens just click OK.
6) Now pick a tube you want to come through the rip in the page then apply it to the new layer so part of it is below the rip. If what you want is too small the size rip resize the page. (don't worry that it's all on top).
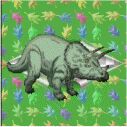
7) Now open your layers pallet and move the new layer (layer 2) over the layer 1.
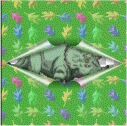
8) Now using the freehand tool select the part that you want behind the rip. Be sure to follow the line of the rip. (yours will be the ants) Now hit the delete key or edit + cut. Do this to all areas you want behind the rip.
Then drag layer 1 back over layer 2


9) Now crop to the size you want or just resize,
Then merge + merge all (flatten), Then save as jpg.

Copyright © 2000 by GandlfDrgn, all rights reserved
| Tutorials By GandlfDrgn@AOL.com This and all tutorials made by me are copyrighted and are the sole property of GandlfDrgn. All graphics used in this tutorial are property of there respective artist and I would like to give them full credit and thanks. I give my permission to Ldy Archrr aka Artists for PSP to place any and all tutorials that I have made on her site.. this 18th day of October 2000. |