|
 
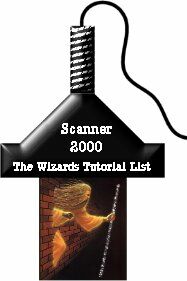
Scanner Tutorial
.
.
1) Open a new image 300X300 16 mil color.
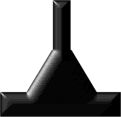
2)select the shape tool  set your foreground color to black or the color you want your scanner and
make a rectangle 200X90.
set your foreground color to black or the color you want your scanner and
make a rectangle 200X90.
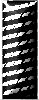
3) Now using the deformation tool  and Holding the Ctrl key down deform the top untill its 35 pix wide and
move it to center of image and apply.
and Holding the Ctrl key down deform the top untill its 35 pix wide and
move it to center of image and apply.

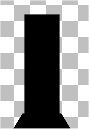
4) Now add a new layer.
5) make a rectangle 50X240 with shape tool and move it
so its centered under the deformed one.

6) Now add another new layer.
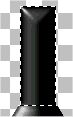
7) Add another new rectangle 35X100 with shape tool and
move it to the center top of the deformed rectangle.
8) Merge visible
9) Select with magic wand  and apply innerbevel
  30, 15, 12, 0, 50, color white, 315, 50, 30. Then deselect.
 resized
50% resized
50%
10) Now using the selection tool select just the top
rectangle.
11) apply Andromeda Cutline set at LPI=8, cutline
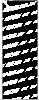
12) inner bevel with same settings as above.
13) add new layer
14) Using the line tool  set at
 second
tab second
tab
 and
draw a line out the top and going around and off the side. and
draw a line out the top and going around and off the side.
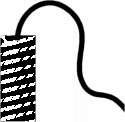
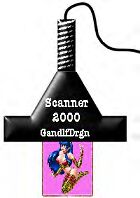
15) Merge all (flatten), Resize, add a name like
scanner 2000 or whatever you want and your done.
Copyright © 2000 by GandlfDrgn,
all rights reserved
Tutorials By GandlfDrgn@AOL.com
This and all tutorials made by me are copyrighted and are the
sole property of GandlfDrgn. All graphics used in this tutorial
are property of there respective artist and I would like to give
them full credit and thanks. I give my permission to Ldy
Archrr aka Artists for PSP to place any and all tutorials
that I have made on her site.. this 18th day of October 2000. |
|