|
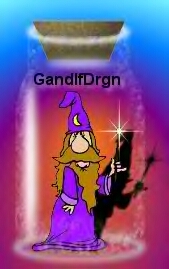
Making A Bottle Tutorial or In A
Bottle
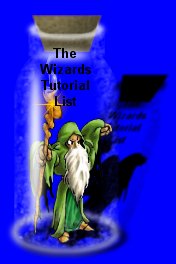
Hi all, Well I had a fun time doing this tutorial but had to ask some advice from a couple of friends. So at this time I would like to give them thanks for all the help.
So a BIG ThANK YOU to BLADEN BuTTerFly and Rukrzi.
So there's going to be a couple of notes threw this one to point out different things that can be done for different effects. Because even grate minds think differently.
I know get on with the tut and stop all this praising.
Thanks for reading my thank you. On to the tutorial!
1) Open a new image 300X300, transparent and 16 mil. color.
2) Flood fill it in Blue and then add a new layer.
3) Using your selection tool set at 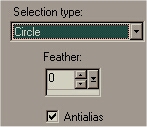 Make a circle 100 pix across near the top of your image, but leave some room for the top and cork.
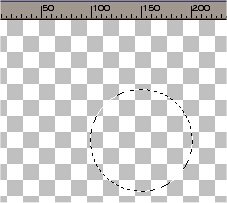
4) Now change the setting of the selection tool to rectangle. Now holding down the shift key on your
keyboard draw a rectangle starting at the out side edge center of the circle and go down to almost the bottom.
The first one shows what your selecting and the second pic shows what you get when you let go of the right mouse button.
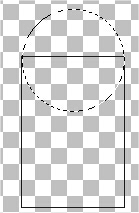
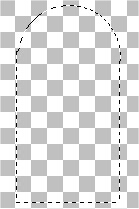
5) Now let's add the neck by holding the shift key and making a rectangle about a ¼ of the way in off the edge and going to the same spot on the other side and up about 30
pixels.

6) Set your foreground color to white. Now select your airbrush tool and set it like
this:
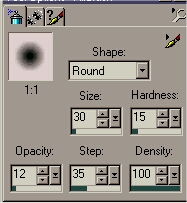

Now what were going to do is spray around the edges like this. Then deselect.
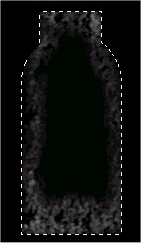 "In black for your better viewing." "In black for your better viewing."
7) Now add a new layer then with the shape tool set like this:
first tab 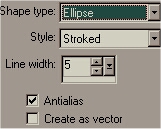 second tab second tab

Make an ellipse at the bottom in lite gray (html code C0C0C0) like this. Make sure the bottom of the ellipse is even with the bottom of the bottle. The bottom of the bottle shape should be just under the ellipse by one or two pixals use the move tool if you need to, I always do. Make sure the bottom of the ellipse is even with the bottom of the bottle. The bottom of the bottle shape should be just under the ellipse by one or two pixals use the move tool if you need to, I always do.
8) Now click back to the bottle layer #2 and using the erase tool remove the extra that is out side the ring. Only at the bottom.
I did this in red so you could see 

9) Now go back to layer 3 then go to image + Blur + Gaussian Blur set at: 

10) Now add a new layer. Set foreground color to white. Now lets make the top ring, using the shape tool set same as before make an ellipse around the top staying just to the edge of the bottle and just covering the top edge. ( Again use the move tool if you need to.)

11) Now apply the blur like you did to the bottom ring. 
12) Ok here is where you need to open or select the tube or pic you want inside the bottle. Copy or resize and past as new layer or add new layer and apply. Resize if you need to using the deformation tool and move to the bottom. Add any extras you would like to the inside of the bottle.
13) Now you need to move layer #5 under layer #2 and then move layer #3 under layer #5 so it all looks right and your tube is in the bottle.
 resized resized
14) Now lets add the cork. Click on layer 4 then add a new layer, Then using your shape tool make a rectangle inside the top rings edges going down about 15
pixels and up about 10 pixels. 
15) Now use the select tool and make a rectangle around the rectangle and click once inside to make the
ants go around the out side of it. Then open this texture  and flood fill using pattern and select cork texture on the second tab.
16) Now using the deformation tool. Hold the shift key on your keyboard and squeeze in the bottom by
dragging one of the bottom sides in. (resize the size if you need to so it stays inside the ring.)

17) Now lets add a cutout to the cork. While its still selected go to image + effects + cut out set at
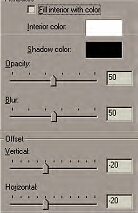
18) Now move layer #6 under layer #4. Now using the erase tool erase the ring back that covers the cork.

19) Now select layer #4 and lets deform it a little. Click deform and bring the bottom up 10
pixels and apply. 
20) Now move layer #6 under layer #2. Now using the erase tool erase any of the bottle that shows above the ring.
 
21) Now this is the first option you have. At this point you can either add a perspective shadow (eyecandy set at 67, 30, 96, 100, 2 and black.)to the tube inside the bottle or wait until a later step. Your choice. Also add a shadow to the bottom ring. (Image + effects + drop shadow set at black, 50, 7, 3, and 3.)

22) Now lets X out layer one and then merge visible. Now un X layer one.
23) Now this is your second option. Now add the perspective shadow (Eyecandy set the same as above.) to the merged layer. Again your choice.
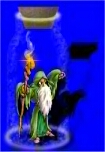
24) Now lets add the reflections. Add a new layer. Then using the shape tool set at ellipse filled make a narrow ellipse on one side and another just below the cork
(Make sure your foreground color is white.)

25) Now go to image blur gaussian blur set at 4 and apply.

26) Now add any extras you might want then merge (all) flatten and save.
If you have any questions or comments please feel free to send them my way.
Copyright © 2000 by GandlfDrgn,
all rights reserved
Tutorials By GandlfDrgn@AOL.com
This and all tutorials made by me are copyrighted and are the
sole property of GandlfDrgn. All graphics used in this tutorial
are property of there respective artist and I would like to give
them full credit and thanks. I give my permission to Ldy
Archrr aka Artists for PSP to place any and all tutorials
that I have made on her site.. this 18th day of October 2000. |
|