|
Sunglasses Tutorial
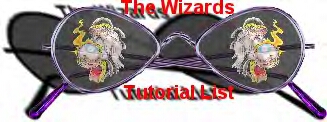
Well all, Let me tell you. This one was a bugger, Just when I thought I had it done I would find something new to make them look even better and would have to start over.
So I hope your happy with the end results.
With that said I sure would like to see what all of you do with this one.
Notes are in red
1) Open a new Image 350X200 transparent 16 mil. color.
2) Using the line tool set at single line, stroked and 5, make 3 line's one up at an angle 2 squares, One across 14 squares and up 2, and the last one across 1 square. Like so.
 Yours will be one color.
3) Now using the magic wand select it. Now metalize or buttonize it.
I'm going to metalize it using flaming pear silver. You use what you want or just use the image + effects + inner bevel.

4) Now copy (Ctrl + C) and paste as new selection (Ctrl + E). Then mirror and move it to where it lines up with the other one.
(Use your squares for this and it should come out
right). Deselect.

5) Now add a new layer. Then using the line tool again make 2 lines side by side and overlapping a little, go from just below the bind and a little past the end. Then add a small circle using the shape tool.
 Again yours will be one color. Again yours will be one color.
6) Now metalize that in a different color or make sure it was done in a different color and inner bevel.
 I used flaming pear primus. I used flaming pear primus.
7) Now copy and paste as new selection. Then mirror and place it over the other arm in the same place.
(remember use the squares to help with this).

8) Let's merge visible those 2 layers and then add a new layer.
9) Now set your foreground color to, R 32, G 32, B 32. Then using the shape tool any shape you want make a shape about 150X150.
I'm using a circle but want it more tear drop shape so IM going to deform it using image+ deformations + pinch set at 99. I had it off to the right side. But I'm going to move it to the left side when I'm done.
From this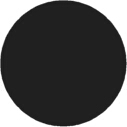 to this
10) Now add a tube or some text in the lens area only don't go out side it.
(Text can be added in the end as well)

11) Now using the selection tool draw a rectangle around it and click once in side to select it. Then go to selections + modify + expand and set it to 5.
12) Now flood fill the open area with the same color you used for the arms. Then deselect.
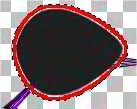 Yours will be the color you used for your arms. Yours will be the color you used for your arms.
13) Now using the magic wand select the filled area and copy it. Then undo all the steps back until the point where you selected the lens #10.
14) Go to your layers pallet and move the slider next to layer 1 to 75.

15) Now paste as new layer. Then using the deformation tool make it a little smaller so it covers the edges of the lens's. And then select it with the magic wand
(If the wand don't select it all use the selection tool and draw a rectangle around it and click once inside it) and metalize or inner bevel it like you did on the arms.
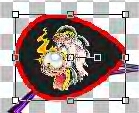 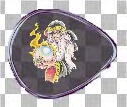
16) Now go to your layer pallet and X out the merged layer.
 Do not click on the merged layer just on the glasses next to it.
Then merge visible the remaining layers. Then UN X the merged layer. Do not click on the merged layer just on the glasses next to it.
Then merge visible the remaining layers. Then UN X the merged layer.
17) Now copy (Ctrl + C) the lens and paste as selected
(Ctrl + E). Then mirror and move it to the other side and line it up with the first one.
(Again use the squares to help.)
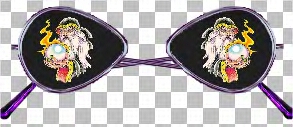
18) Now add a new layer. Then using the line tool set at Bezier Curve, stroked and 5 draw a line even with the arms from lens to lens then go up one square and click twice to get this.
 It should be the same color you used for your arms. It should be the same color you used for your arms.
19) Using the magic wand select it and do to it the same thing you did to the arms. Then drag new layer under the first merged layer.
20) Now merge visible. Add what you want to them or around them. Merge (All) flatten and save your done.
Now you can use any shape or color you want in the frames and lens's be creative.

Tip for Sunglasses Tutorial
OK, All here's a little tip on making them sunglasses.
Ok got mail saying they were having truble selecting just the frame when making the eye piece.
So here's a tip if your using psp6 but only if your using 6 it wont work in 5 sorry.
instead of making your shape filled set it to stroked and make the shape.
Then deform if your going to. Then using the magic wand select the center and flood fill with the glass color you want and copy.
then do the undo back to just before selected the center.
Now select the frame and do what you want to it.
Then paste as new layer and you should have the lens all you have to do is make it a little bigger using the deformation tool. Add a tube if ya want and lighten in the layer pallet. then go on from there with the rest of the steps in the tut.
I hope this helps out all that had truble the other way.
And of course please feel free to e-mail me if you need help with any one of my tutorials
In that tip I missed one step :o(
Before you go on the the original tut move the lens layer under the frame layer so its in the right
place.
Silly me.
I am so sorry
Copyright © 2000 by GandlfDrgn,
all rights reserved
Tutorials By GandlfDrgn@AOL.com
This and all tutorials made by me are copyrighted and are the
sole property of GandlfDrgn. All graphics used in this tutorial
are property of there respective artist and I would like to give
them full credit and thanks. I give my permission to Ldy
Archrr aka Artists for PSP to place any and all tutorials
that I have made on her site.. this 18th day of October 2000. |
|