|
Name Gate Tutorial
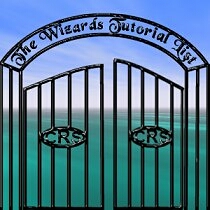
Open a new image 300X300 transparent 16mil color.
Using the line tool set at 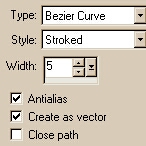
Make a line from 50X100 across to 250X100 then go to 150X50 and click twice.

Now click on the text tool the letter A and then click on the line you just made the A will turn into and A with a curved line under it. Type in your name click ok.
Now with that done deselect when it asks you if you want it dropped to the layer click ok.
Now copy the line by Ctrl + C then go to your layer pallet and right click on the #2 layer and click convert to raster.
Now paste the line you copied as new selection Ctrl +E then place it on top of your name.
Deselect.
 the name will be on a different layer.
Now using the selection tool set on rectangle even up the ends by making a rectangle that catch's just the ends and hitting the delete key on your keyboard do this to
both sides.

Now using the line tool set at 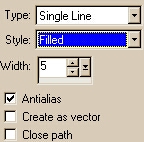
Make two lines coming down from the top line on each side.
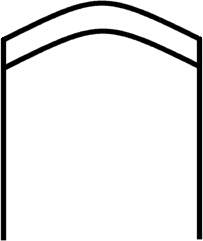
Now go to layer + merge + merge visible.
Then go to your favorite beveling filter or image effects inner bevel and and bevel what we have done so far.
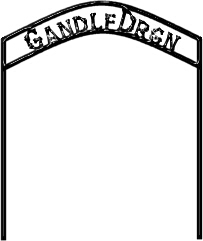
Now we are going to add the gates so add a new layer.
Using the text tool, type in 1 to 3 letters making the center one larger if your using psp 6.

Now using the shape tool set on ellipse stroked and 5 make an ellipse around the letters if you have truble add a new layer and then you can move it
around and resize it using the deformation tool. If you used the layer method you need to go to your layer pallet and click on the glasses next to layer one then go to layers merge + merge
visible. 
Then go back and click on the glasses again now copy this and paste as new selection then place it on the other side for the other gate. Deselect.
Now add a new layer. then using the line tool set on 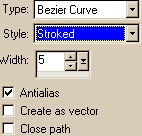
Make a line from one side to the other then go to the center and up some and click twice.
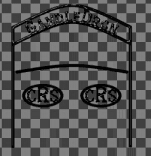
Now take the erase tool and erase about 6 pixels from the center by setting the size to 6 hardness to 100 and shape to square and clicking and
dragging straight down the center.

Now go back to the line tool and draw lines going down from the line you jest drew to the bottom of the side lines you drew
earlier. Do this in the center and sides. Then draw lines across the bottom to join the side lines of the gates.
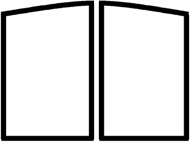
Now still using the line tool make lines going from top to bottom of the gate
evenly spaced apart but not going over the letters you did earlier.

Now go to your layer pallet and click on the glass's next to the layer one then go to layer + merge + merge
visible. Then go back and click on the glasses to make layer one visible again.
Now go and do the same inner bevel you did to the gate frame.
Now add a new layer and then using the line tool make 4 small lines on the side of each gate for hinges. Then inner bevel them as well.
Now go to layer + merge + merge visible.
Now its time for you to add your finishing touches add more fence along the sides add a background some tubes flowers what ever your heart desires.
Then merge all flatten save as jpg name and your done.
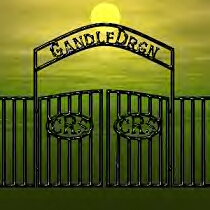
Copyright © 2000 by GandlfDrgn,
all rights reserved
Tutorials By GandlfDrgn@AOL.com
This and all tutorials made by me are copyrighted and are the
sole property of GandlfDrgn. All graphics used in this tutorial
are property of there respective artist and I would like to give
them full credit and thanks. I give my permission to Ldy
Archrr aka Artists for PSP to place any and all tutorials
that I have made on her site.. this 18th day of October 2000. |
|