|
Building A Crypt
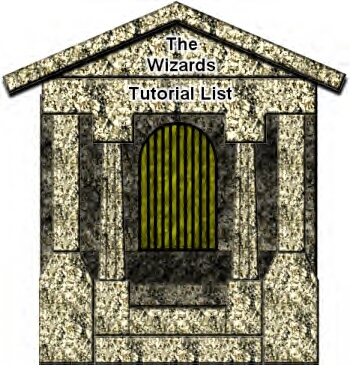
1) Open new image 500X500 transparent 16 mil color.
2) Now using the selection tool set at rectangle make a rectangle 300X100.
3) hold down the Ctrl key and take a rectangle 150X50 out of the center of the one you just made.
4) Flood fill in white. Now select the line tool set at single 1 pixel make 2 lines down from the corner of each droped area.
 before before  after
after
I had to add the red glow so you could see the image. your will not have this.
5) Then go to image + effects+ sculpture and use # 6 or 16. Deselect.
 < 6 < 6  < 16 < 16
6) Add a new layer. Now still using your selection tool make a rectangle 300X50 under the first one. and then flood fill white and apply the same sculpture you used in the last one to it.
Deselect.

7) Now add a new layer. Then using the selection tool make a rectangle next to these two 100X150 then flood fill in white and deselect.
8) Now using the selection tool select the top part of the new rectangle from the top of the first two up.

9) Now click on the deformation tool and holding down the Ctrl key draw the top in by 10
pixels on each side. Apply. Deselect. (if you draw in one side the other will do the same so only draw it in on one side to get this look)

10) Using the airbrush set at about 2 or 3 spray over the line made be the deformation.
11) Now draw a rectangle around the image with the selection tool and click once inside to select the image. Then apply the same sculpture as before.
12) Copy the image (Ctlr + C). Deselect. Paste as new selection and place it on the other side even with the bottom.
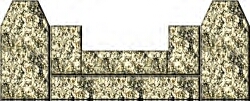
13) Lets merge these layers now. And then move the image down to the bottom of the image.
14) add a new layer and using the selection tool make a rectangle 50X250. then flood fill in white. do this above the
flat areas on the first rectangle.

15) Now using the line tool set as before make 2 lines running from top to bottom down the column
splitting it into 3 parts.
16) Now apply the sculpture same as above. Copy (Ctrl +C) Deselect.
17) Paste as new selection (Ctrl + E) and place this on the other side.
18) Add a new layer then using the selection tool make a rectangle 50X250 above the side deformed block flood fill white the apply the same sculpture as before. Copy and paste as new selection and move this to the other side.

19) Add a new layer and make another selection rectangle for the porch. 420X100 flood fill white , apply sculpture Then using the airbrush
foreground color black, paper texture set at clouds spray over the rectangle then move this layer under the bottom layer in the list. Deselect.
20) Add a new layer, Make a selected rectangle 50X150 flood fill white, apply
sculpture same as before. then spray it over with the airbrush same as in step 19. Now move this layer to the second place from the bottom in the layer pallet.
 
21) Now merge visible, then resize the image to 75%.
22) Now open a new image 500X500 transparent 16 mil color.
23) Now copy the resized image and paste it onto the new image as a new layer. (Ctrl + L)
24) Move the image to the bottom. Then add a new layer.
25) Make a selected rectangle 270X250 flood fill in white then apply
sculpture same as before, then spray it over like in step # 19 but just a little lighter then move it to the next to last place in the layer pallet. Deselect.
26) Click on layer 3 then add a new layer. Make a selected rectangle 50X40 over the top of the tapered column, flood fill in white then copy and paste as new selection and move this over the top of the other column.
Deselect.
27) Still on that layer make a selected rectangle 370X50 over the top of the first ones like this. Deselect.

28) Now using the selection tool draw a rectangle around this image and then
click once inside it to make the ants move around the outside of it. Then apply the sculpture same as all along.
29) Now add a new layer. Click on the shape tool select triangle and make a triangle 270X80 Now if its upside down just go to image +flip then move it to the top and set it on the column block.

30) Use the selection tool and draw a rectangle around this shape click once inside and then apply the
sculpture effect. Deselect.
31) Add another new layer. Now using the line tool set at 25 pixels, filled make a line 280 pixels long running down the triangle then move it so it
sits on top of the triangle. Then copy paste as new selection go to image + mirror and place this on the other side of the triangle making sure there hanging over the edge the same amount.
32) Use the selection tool and draw a rectangle around this shape and click once inside then apply the sculpture effect. Then go to image effects dropshadow set at black, 100, 4.7, 6 and 1 apply then deselect.

33) Add a new layer then using the selection tool make a circle 200 pixels wide, Now change the selection to rectangle then holding down the shift key make a rectangle from the center of the circle down to the floor as wide as the circle.
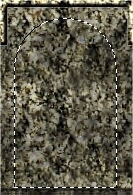
34) Now click on the layer that has the wall Should be layer #2 and hit the delete key then click back on layer 7.
35) Now go to selection + modify + expand set to 2 and click Ok then flood fill in black. Then go to selections + modify + expand set to 4 click Ok hit the delete key and deselect.
Note: Now this is your gate so inside the shape you just made do what you please use dings or what ever you want.
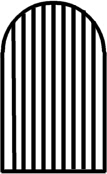
36) Now using the line tool set at single, 4 wide and filled draw lines from top to bottom evenly spaced.
37) Add a new layer then with the selection tool make a rectangle 150X200 flood fill in black then set the
foreground color to white or yellow and using the airbrush paper = clouds, size = 255 spray over the rectangle lightly. Now move this layer to the bottom of layer 2. Deselect. Merge
visible.
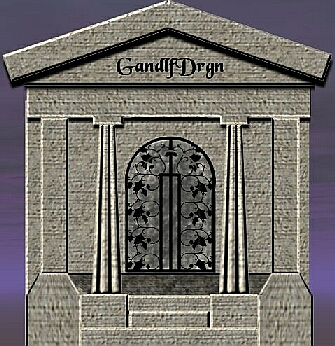
And there you have it one crypt decorate as you would like and your done.
Copyright © 2000 by GandlfDrgn,
all rights reserved
Tutorials By GandlfDrgn@AOL.com
This and all tutorials made by me are copyrighted and are the
sole property of GandlfDrgn. All graphics used in this tutorial
are property of there respective artist and I would like to give
them full credit and thanks. I give my permission to Ldy
Archrr aka Artists for PSP to place any and all tutorials
that I have made on her site.. this 18th day of October 2000. |
|