|
|
|
|
Polaroid Camera Part 2
. This is a very long 4 part tutorial but as you can see below it is going to be well worth it. There's a little addition in part 4 that will make the tag below real sweet. .
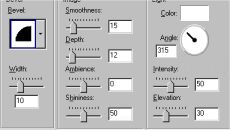
. Part 2 The Polaroid Camera . 1) Open an image 300X300 transparent 16 mil. color. 2) Set your foreground color to black or the color you want the camera to be. 3) Now using the shape tool 4) Now go to image + effects + Inner bevel.
5) Now add a new layer by opening your layer pallet and clicking on the page in the top left corner, then just click OK when the new window opens. 6) Now make another rectangle 50X210, then inner bevel it using the same settings as above. Then go to image deformations skew.
7) Now add another new layer. Then make yet another rectangle on it 65X210 and inner bevel it same settings as above. 8) Now line up all the rectangles keeping all the sides even like this.
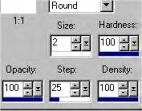
9) Now merge visible and then move it down to the bottom, then add a new layer. 10) Now click on the line tool and set it to.
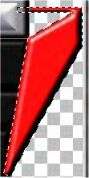
11) Now flood fill
12) Now we need to add the flash bar so open it up and copy it then past it as a new layer. Then move it to the top of the front.
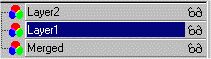
13) Now go to your layer pallet and click on layer 1 to make it active.
Then using the line tool draw a line going from the back right side to behind the flash bar.
14) Now click on the magic wand
15) Now with the spray can
16) Now we need to move layer 1 too behind the merged layer.
. .
Copyright © 2000 by GandlfDrgn, all rights reserved
|


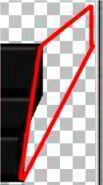
 Draw lines going back from the right side top and bottom up at a slight
angle then one going up to join them together at the back and front. (I
did this in red just to show you where they went, do yours in black or the
color you made the front).
Draw lines going back from the right side top and bottom up at a slight
angle then one going up to join them together at the back and front. (I
did this in red just to show you where they went, do yours in black or the
color you made the front).
 sorry for the blur.
 this took 2 fills.


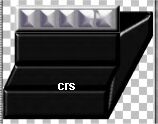 See
it looks better all black.
See
it looks better all black.