|
|
|
|
Polaroid Camera Part 3
. This is a very long 4 part tutorial but as you can see below it is going to be well worth it. There's a little addition in part 4 that will make the tag below real sweet. .
. Part 3 The Finishing Touches . 1) Lets merge visible and add a new layer. 2) Using the selection tool
3) Now open the picture you want in the lines. Then copy and paste into selected (Ctrl + C) to copy (Ctrl + shift + L) to paste into selected. Deselect.
4) Now let's change to foreground color to dark gray
#808080 then using the shape tool
5) Now using the magic wand
6) Now set the shape tool to filled and make a small circle to the right of the lens.
7) Now lets add a red circle in the middle of the gray
one. 8) Now let's add the film slot set the line tool to
width 8 and draw a line across the bottom rectangle like this. Then select
it with the magic wand
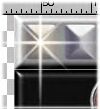
9) Lets copy it and paste it as a new image then add a
white sparkle tube
10) Now add a name or put Polaroid across the 2nd rectangle and resize to a better size or leave it as is and your done for now.
. .
Copyright © 2000 by GandlfDrgn, all rights reserved
|


 <~~70%